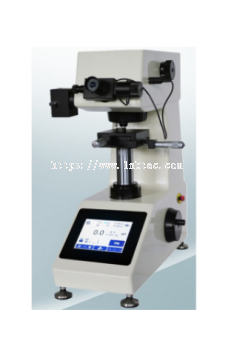
Technical specifications��
|
Testing Force |
0.098N, 0.246N, 0.49N, 0.98N, 1.96N, 2.94N, 4.90N, 9.80N, 19.60N |
|
10gf, 25gf, 50gf, 100gf, 200gf, 300gf, 500gf, 1000gf, 2000gf |
|
|
Objective/Indenters Switch |
Auto-Turret |
|
Magnification of Objective |
10X Observation & 40X Measurement |
|
Testing Range |
1HV��2967HV |
|
Loading Control |
Automatic(loading, dwell, unloading) |
|
Hardness Indication |
LCD display |
|
Dwell Time |
5��60s |
|
Illumination |
Halogen Light-source (LED is optional) |
|
Printer |
Built-in Mini-printer |
|
Max of Height of Specimen |
70mm |
|
Max. depth of specimen |
95mm |
|
Accuracy |
Conforms to EN-ISO 6507 ASTM E384 |
|
Power Supply |
110V/220V,60/50Hz |
|
Instrument Dimension |
425×245×490mm |
|
Plywood Packing Dimension |
530x450x750mm |
|
Gross/Net Weight |
50/40Kg |
|
Standard accesory
|
Main Unit; Auto-Turret; Vickers Indenter; Standard Vickers Blocks; Objectives 10X, 40X; 10X Digital Eyepiece; Instrument Level Spare Light Bulb; Spare Fuse; Thin-piece Clamping Device; Fine Wire Clamping Device; Precision Clamping Device; Operation Manual; Build-in Mini Printer; X-Y anvil size: 100 X 100mm, travel: 25 X 25mm and resolution: 2um. |
|
Optional accesory |
Knoop Indenter; 25mm Digital micrometer head with resolution 1um; Unequal Specimen Clamp anvil; 16x Digital Eyepiece; 6.8” LCD Video monitor and USB camera; 1x CCD adapter and CCD camera; Vickers measuring software |


 US 15035
  GB 12161
  CA 10059
  AU 9607
  IE 5115
  NZ 3644
  BR 2947
  SG 1104


